

This blog is intended to share some recommendations of useful testing tools that are readily available in SAP Solution Manager 7.2. Test Suite is a tool that supports both manual and automated testing and can be customised based on project needs.
Brief Overview of Test Suite: -
- Allows Manual and automated functional tests
- Enables automated change impact analysis of maintenance activities for test scope optimisation of regression tests
- Setting new requirements to trigger semi-automated test planning for user acceptance tests and functional integration tests is possible
- High degree of test automation possible
- Supports an agile development approach within requirements to-deploy process through Focused Build for SAP Solution Manager.
- Seamlessly integrated with SAP Solution Manager Process Management, Solution Documentation, Charm, ITSM, etc.
We will briefly walk-through on how the activities are carried out during a manual testing scenario done through Test Suite.
Sequence of Activities to Setup in Test Suite for Manual Testing: -
- Creation of Folders-Processes-Scenarios for uploading/creating test cases
- Creation of Test Plan to map assignment of Test cases to Test Plan
- Creation of Test Packages to allow assignment of Test Plan with corresponding test data if applicable.
- Creation of Test Sequences if applicable.
- Then Assign them to Testers
- Testers can execute the test and update status accordingly.
- Based on erroneous scenarios, event defects can be raised from Test Suite. Accordingly, IT Service Management tool captures the list of incidents raised and proper resolutions can be maintained in it.
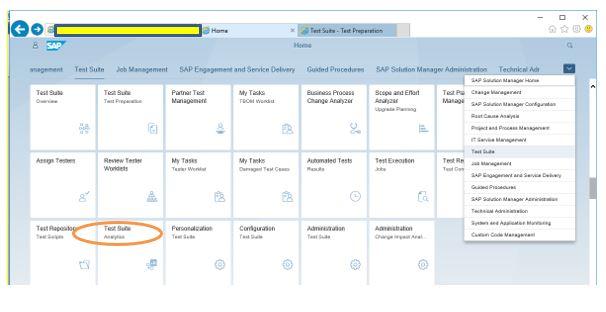
Below are the various Fiori Based Tiles that are relevant in terms of usage from manual testing point of view.
Fiori Based Tiles along with their mapped set of activities is shown below in the diagram: -
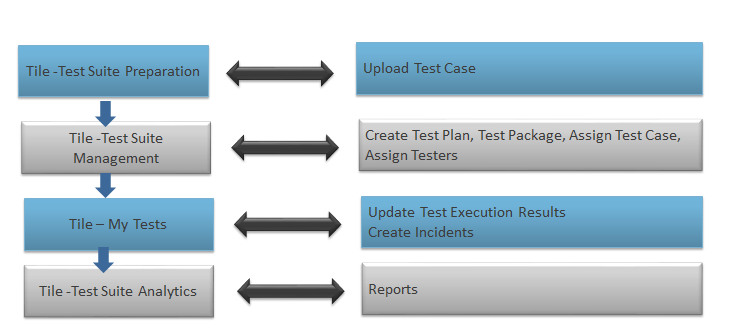
We will now show the sequence of activities done to capture manual testing details for a project: -
- Fiori Tile – Test Suite Preparation (Creation/Uploading of Test Case)
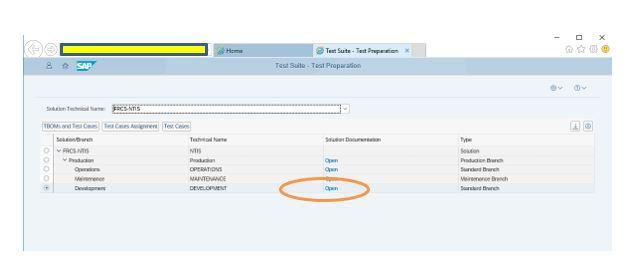
(1) Login and select test suite –

(2) Click on tile Test Suite Preparation to add a test case -
Select the Solution-> then click on Development > click on Open
(3) Select Business Processes-> right click on New in the next block for creating the Sign Up Process for example in this case -
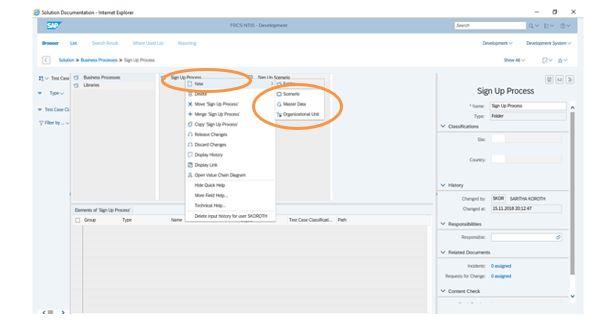
(4) Select Sign Up Process-> right click on New Scenario in the next block for creating scenario Sign Up
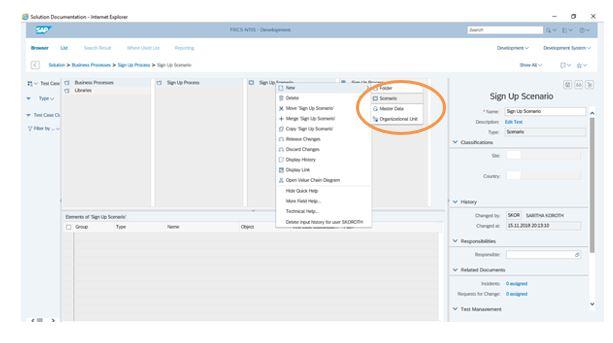
(5) Select Sign Up process and click on New in the below section – select Test Cases- choose Test Document (Upload) option
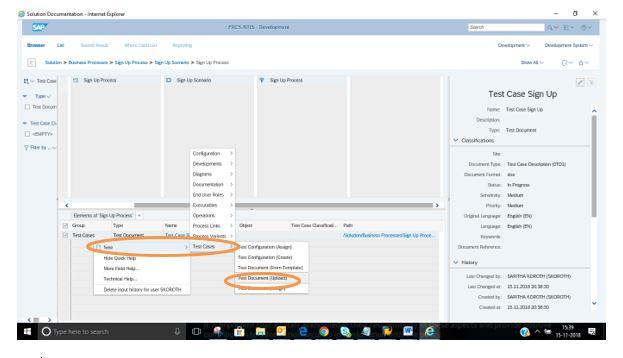
(6) Upload your test case document from the relevant folder
(7) Status- Test Case attached successfully.
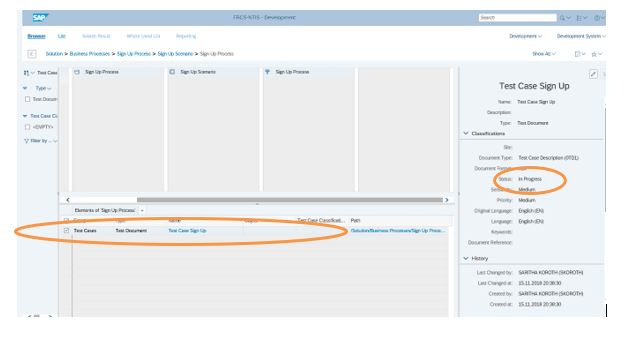
Note- For proceeding further please do make sure to set the status to Released for updating testing status.
Similarly Processes and corresponding Test cases documents need to be mapped and uploaded.
Next Phase- To create Test plan and assign the test case to it-
- (Creation of Test Plan – Assignment of Test cases to Test Plan)
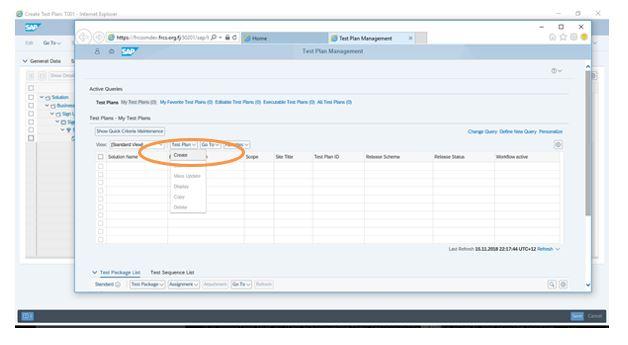
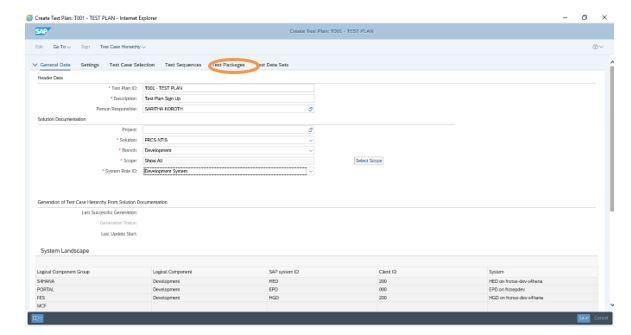
(1) Select Tile Test Plan Management

(2) Click on Test Plan - > New
(3) Fill in general data tab
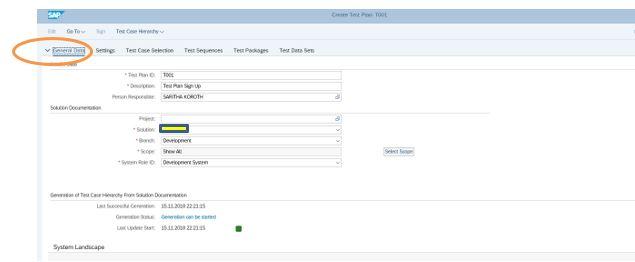
Here you can set the system role id to Quality system based on where the testing is being carried out
(4) Fill in Settings tab
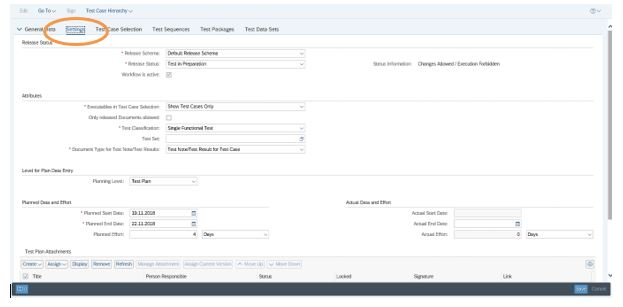
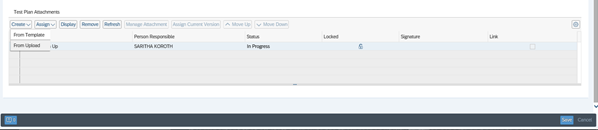
(5) Scroll below and add in any test plan attachment if applicable for this scenario
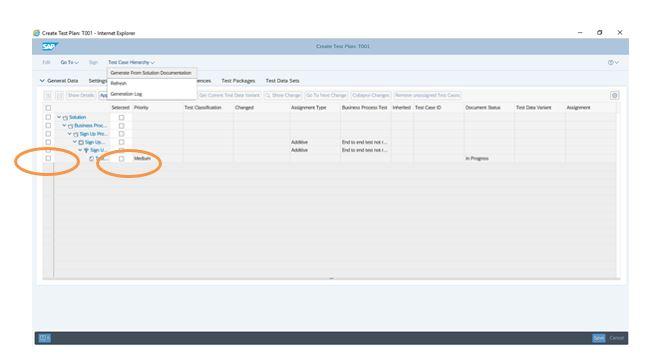
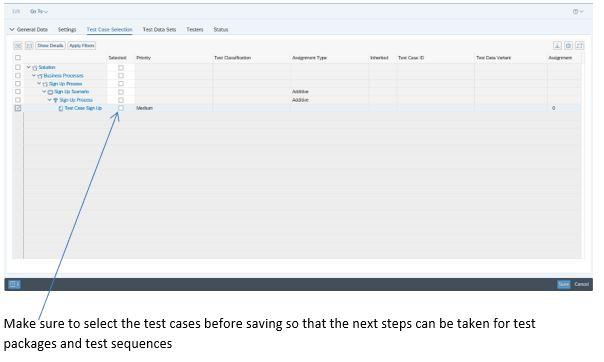
(6) Select the test case selection tab and generate test case hierarchy if required. Put a tick at both boxes highlighted below to confirm on test case selection

(8) Save the test plan
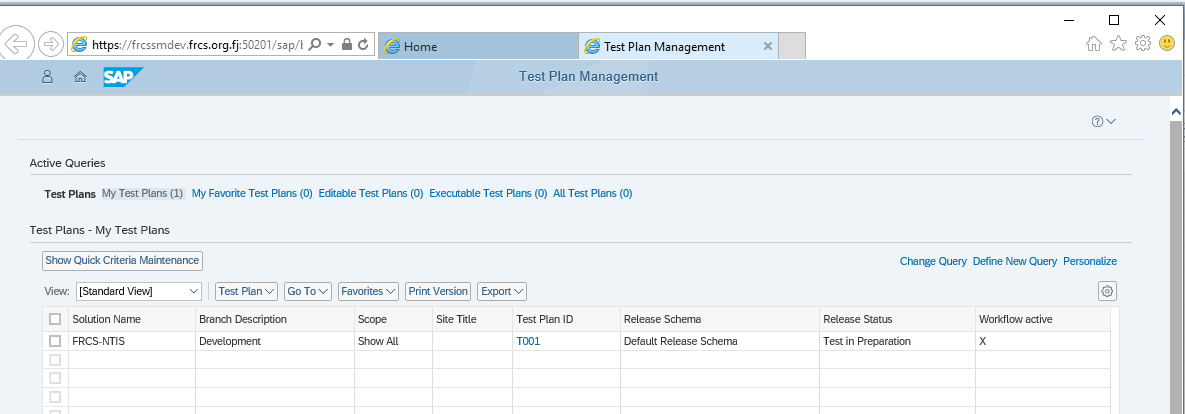
Finally the saved test plan will appear as below –
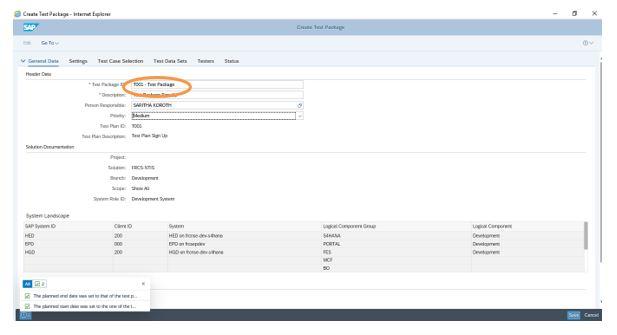
- Creation of Test Packages – Assignment of Test Plan to it
(1) Select the newly created test plan and select the test cases from it
(2) Click on Test Packages and fill in the details
(3) Create a test package for the selected test plan
(4) Assign a tester by clicking on Testers tab
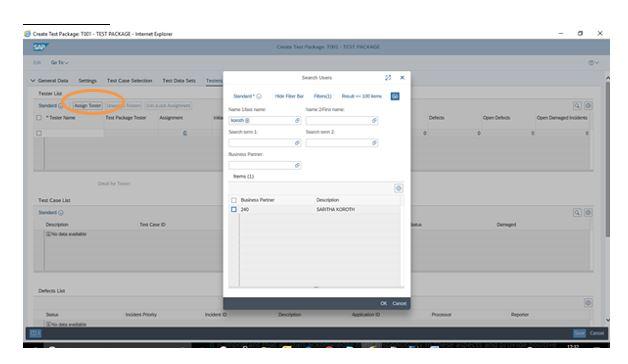
(5) Search for the testers name and add them if found

(6) Click on save
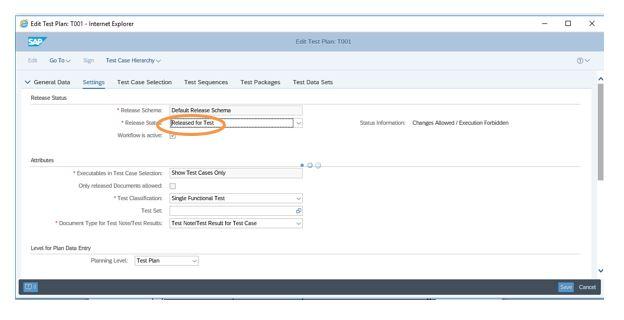
(7) Before a test can start, the status in the test plan has to be set to “Released for testing”.
Edit the test plan and in the settings tab, set the release status to “Released for testing”
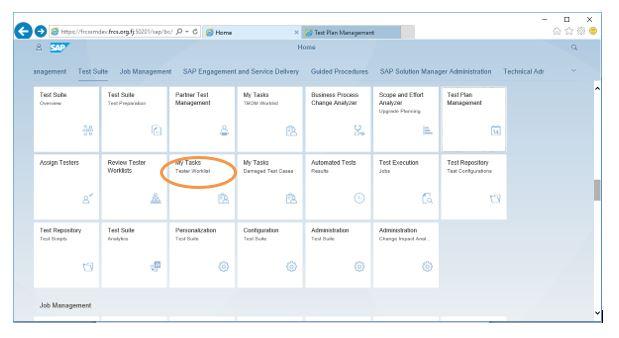
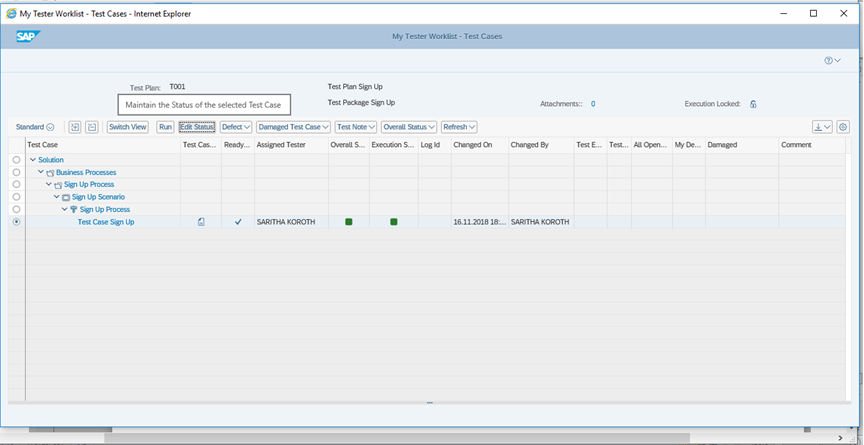
(8) To execute a test case, the tester needs to navigate to tile My Tasks – Tester Worklist inside the Test Suite. On the newly opened page you can select the test package in which you want to test and the test document to be tested. The test case can be opened via Run.
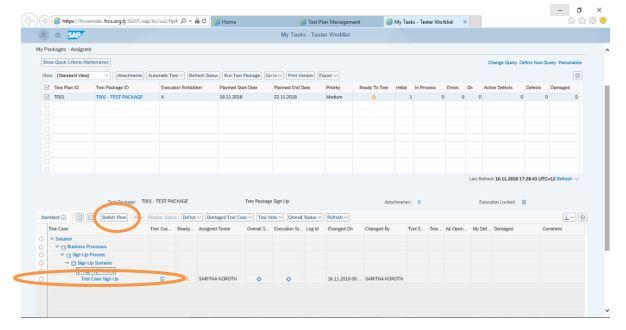
(9) Select the relevant Test Plan and click on Switch View as shown below
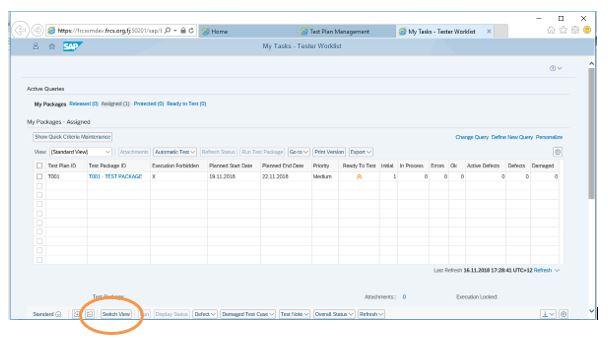
(10) Select the test package that needs to be tested and then change the switch view in the second half
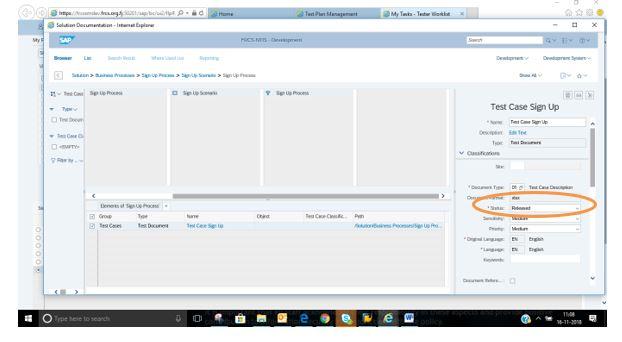
11) Modify the test case if required and then set the status to “Released” or the tester cannot modify the subsequent test execution status
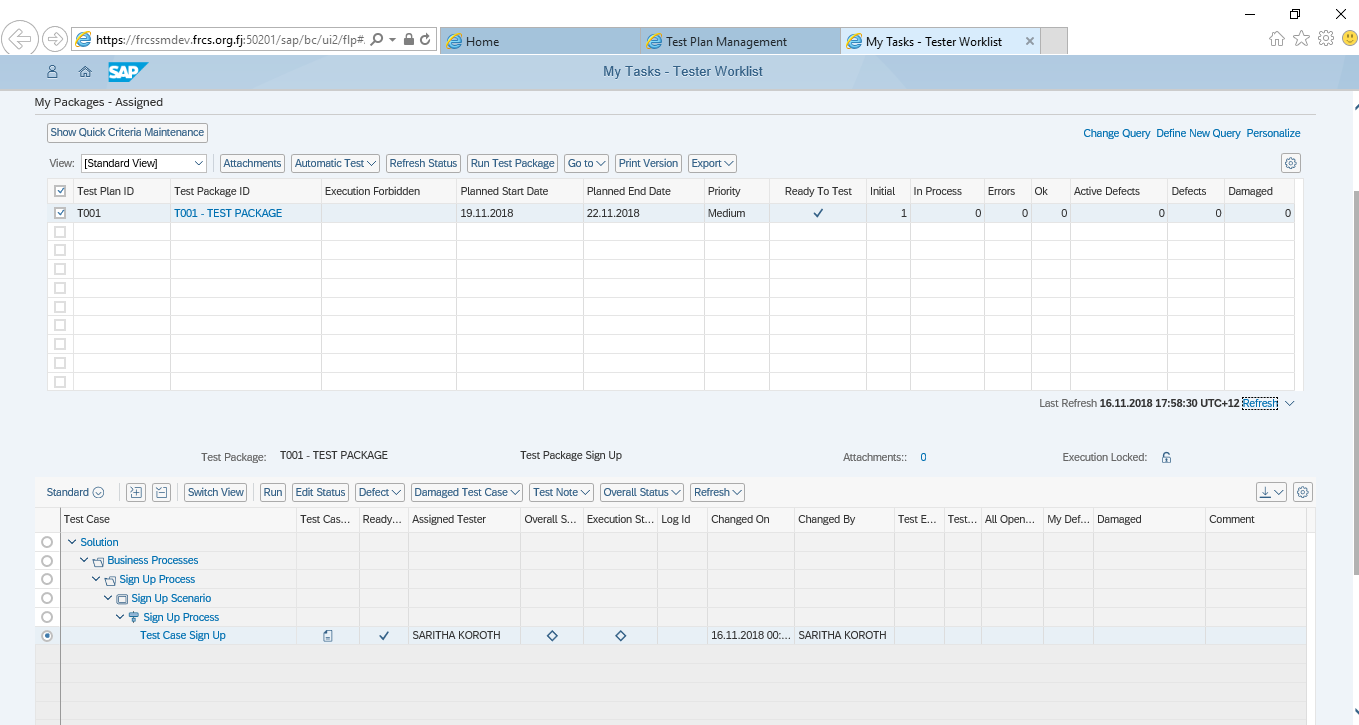
(12) The status of the package is set to ready to test in the earlier steps
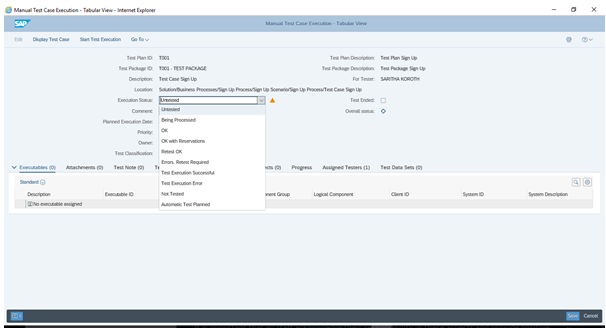
(13) Click on Run for the test case and update with status applicable highlighting either successful or erroneous execution
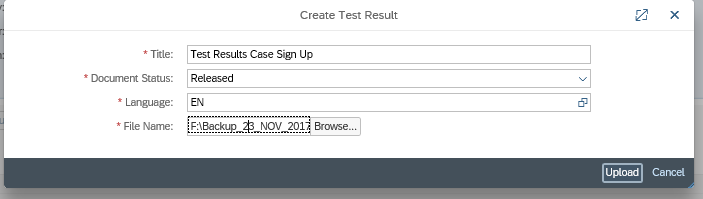
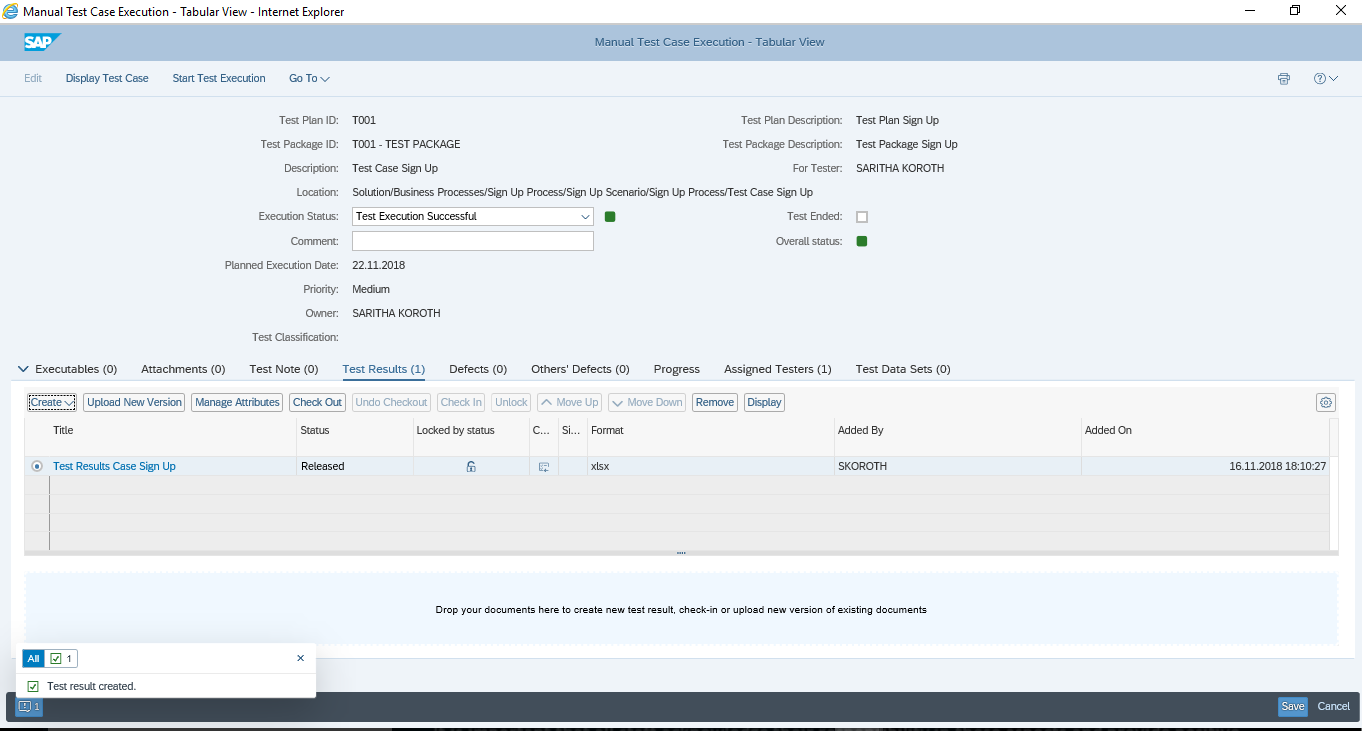
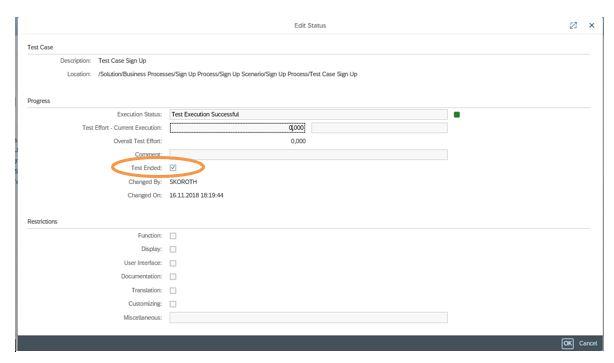
(14) Based on test execution, upload the relevant test documents e.g. test results, defects, etc and finally check the Test Ended checkbox
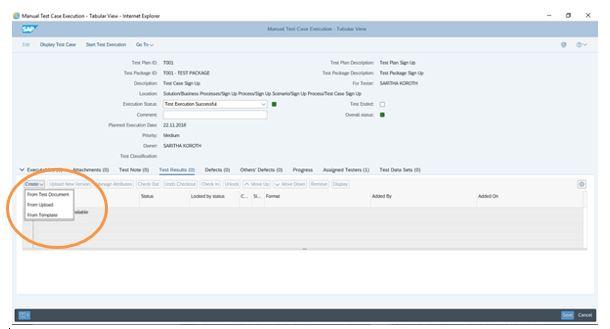
(15) The below screenshot shows a scenario of uploading a successful test result document
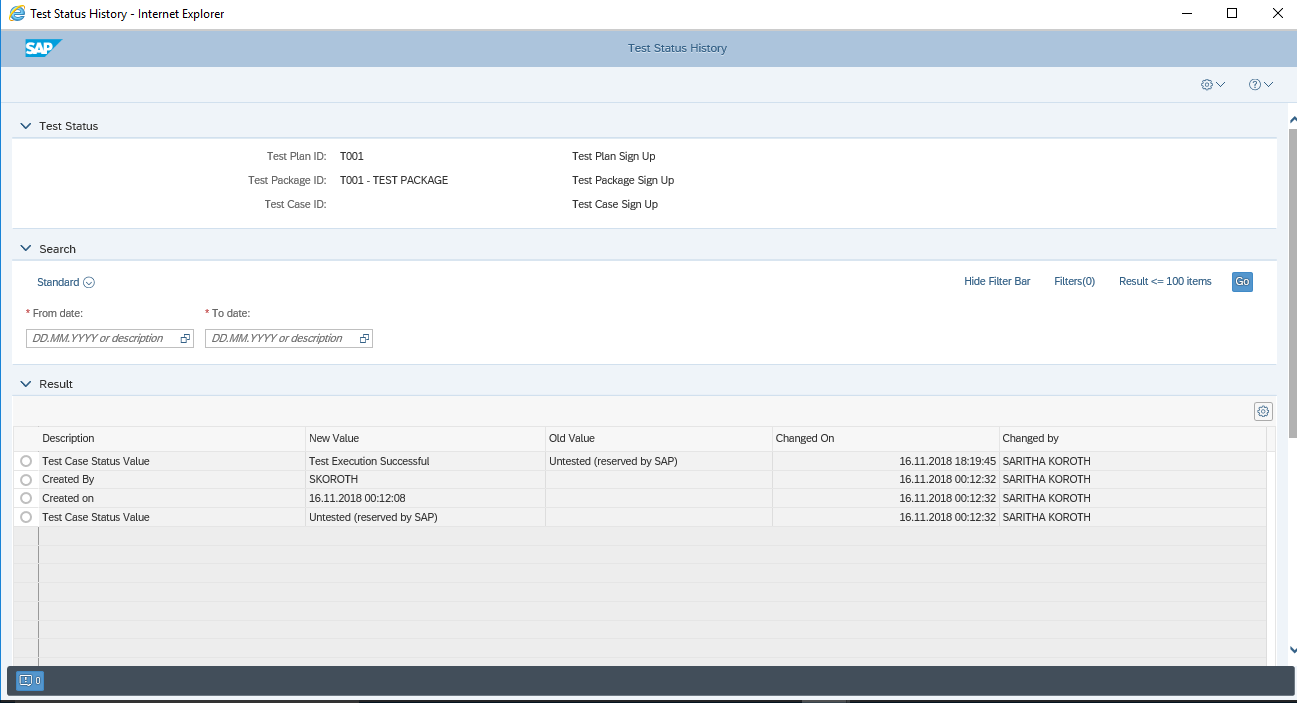
(16) This one a scenario of test case execution history
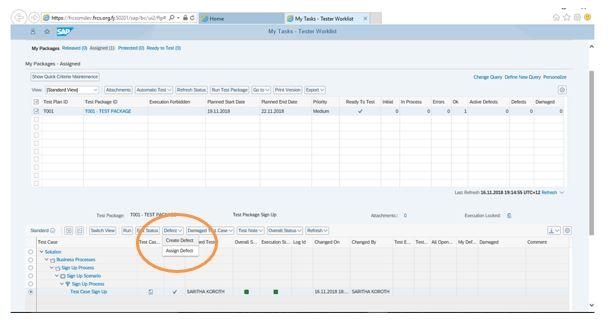
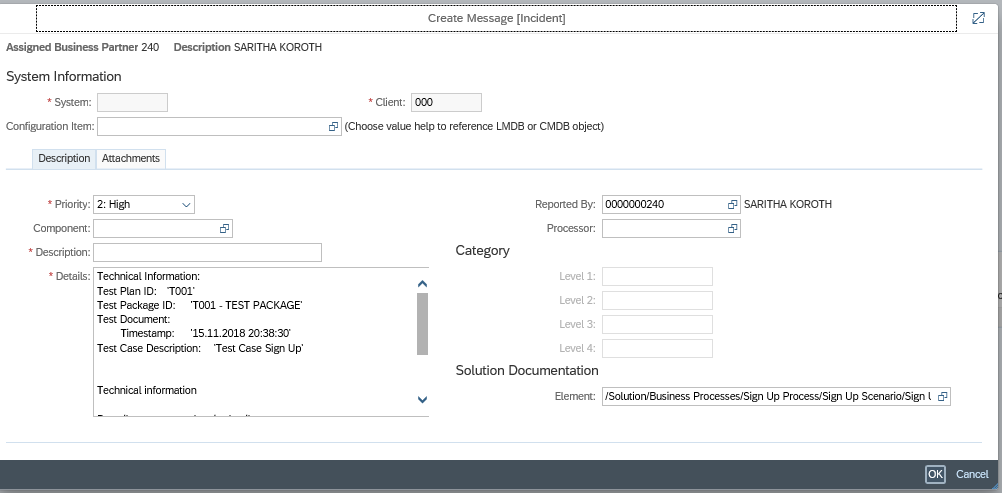
(17) And this scenario shows of how an incident can also be created from below screen by selecting the test case and then selecting defect –
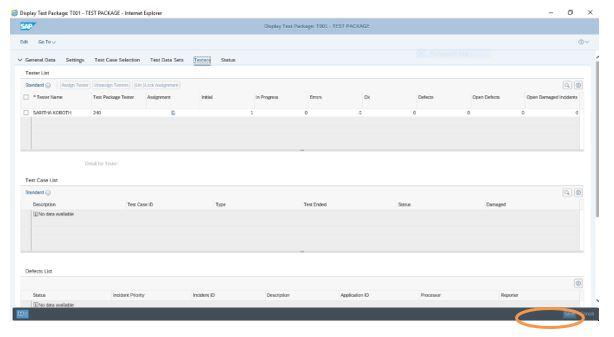
(18) Finally update the status of test package from this screen-
(19) Check the test ended box, fill in any comments and click on OK
Test Suite Reporting
(1) Test Suite provide a lot of standard reports which provide a lot of insights to testing efforts. Select Tile Test Suite Analytics for viewing the reporting features.
(2) Below are the various categories of reports present by default –
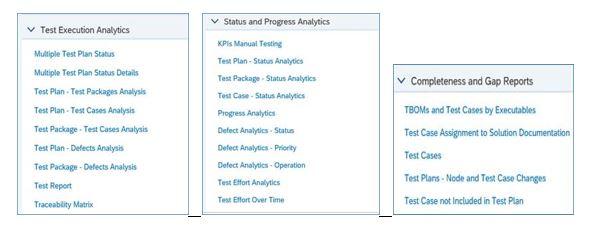
(3) Few examples of reports are shown below for reference –
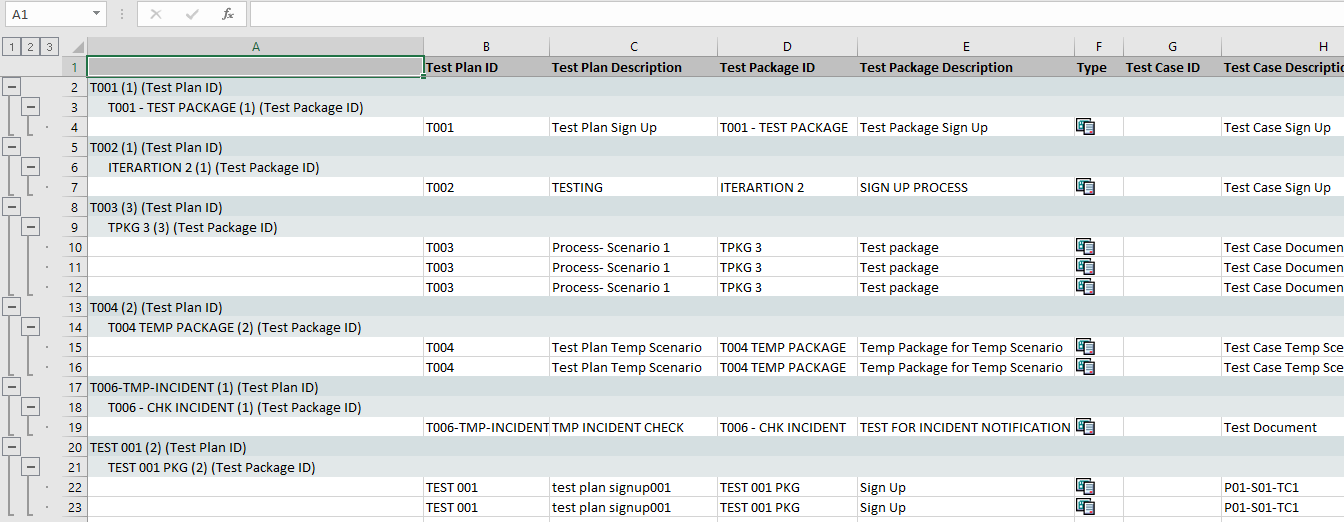
(a) Multiple Test Plan Status Overview – downloaded version in .xls format as shown below

(b) Multiple test Plan Status Detail- downloaded version in .xls format as shown below
(c) Test Defect

I hope that by going through this blog you are now better able to understand the various benefits that Test Suite brings in, including.
- All relevant testing artefacts (e.g. Test cases/Test Results/Defect screenshots) are in one single location, thereby ensuring transparency.
- Testers do not have to provide too many details while creating an incident due to direct linking of test cases/defect screenshots.
- Email notifications generated at various critical stages ensure co-ordination between Testers and Developers.
- Various standard inbuilt reports help in effective project tracking.
Thanks for reading!